Start Here
Quick Start: Your First Work Order in 30 Minutes
This chapter covers the basic lifecycle of work in BigWave. Customer in, work order created, technician assigned, timecard entered, job done, invoice out. Every step links to the chapter that explains it in detail.
The scenario is Beacon Electric’s first residential call. The Okafor family wants their panel looked at.
Before you start
You need a BigWave login with internal access, and your company needs at least one project to put the work order in. Chapter 9 shows how to create one, which takes about two minutes for a basic project.
Step 1: Create the customer
-
Log in. You land on the home page.
-
In the left panel under Manage, click Customers.
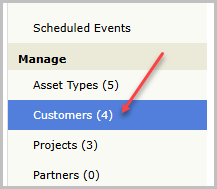
The left panel with Customers highlighted, showing where the link sits in the navigation -
Click Add Customer.
-
Enter the Okafors: last name, first name, address, phone and email.
-
Save.
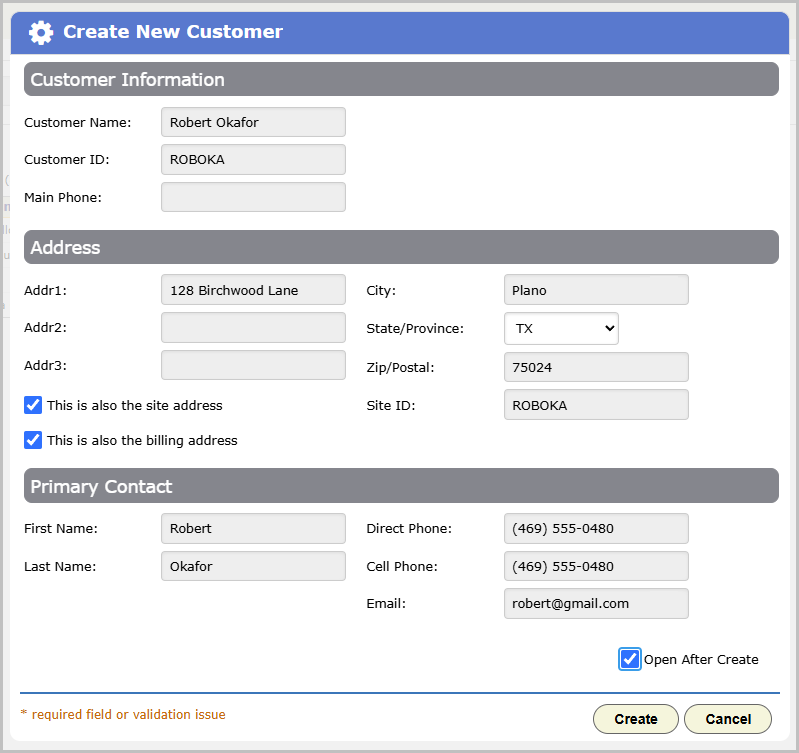
If BigWave suspects the customer already exists, matching on address, name or phone, it shows the possible duplicates and asks you to confirm before saving. Chapter 8 covers that check.
Saving the customer can also create their first Site at the same address. For a homeowner, customer and site usually share an address. They’re still two different records, as explained in chapter 1.
Step 2: Create the work order
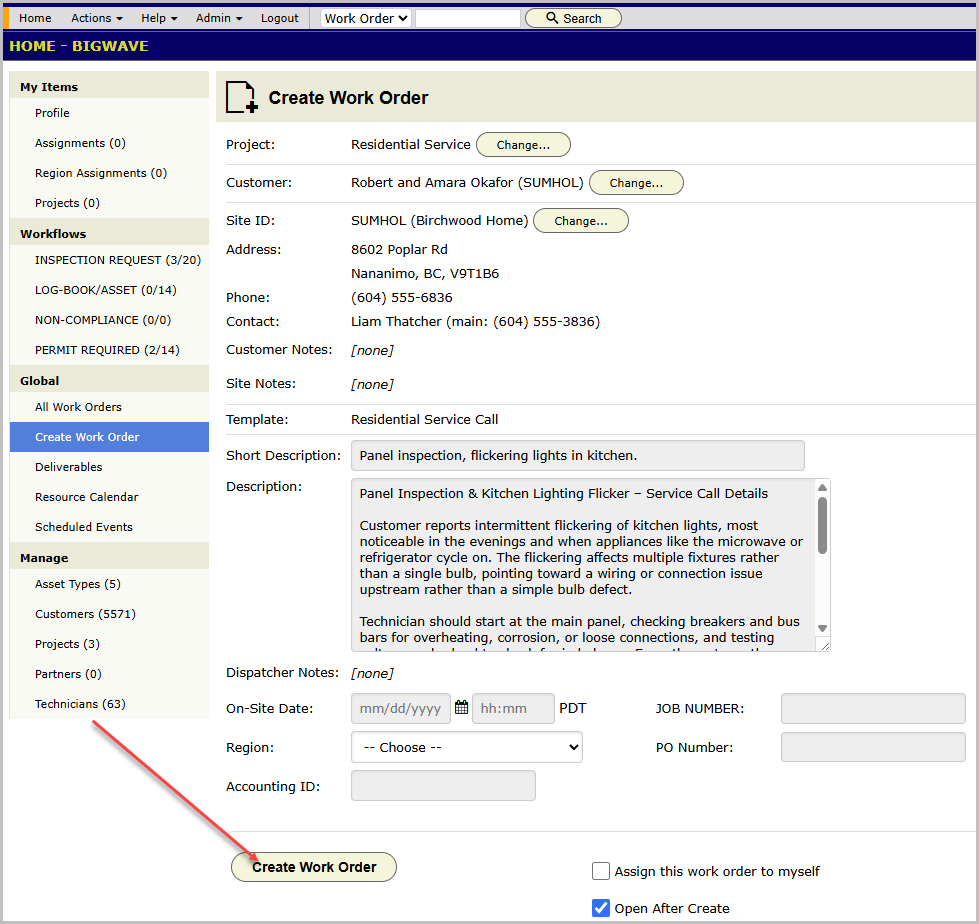
- From the home screen, click Create Work Order in the left panel.
- Pick the project. Beacon uses Residential Service.
- Next to Customer, click Change… and pick the Okafors.
- Next to Site ID, click Change… and pick their house.
- Give it a short description: “Panel inspection, flickering lights in kitchen.”
- Click Create Work Order.
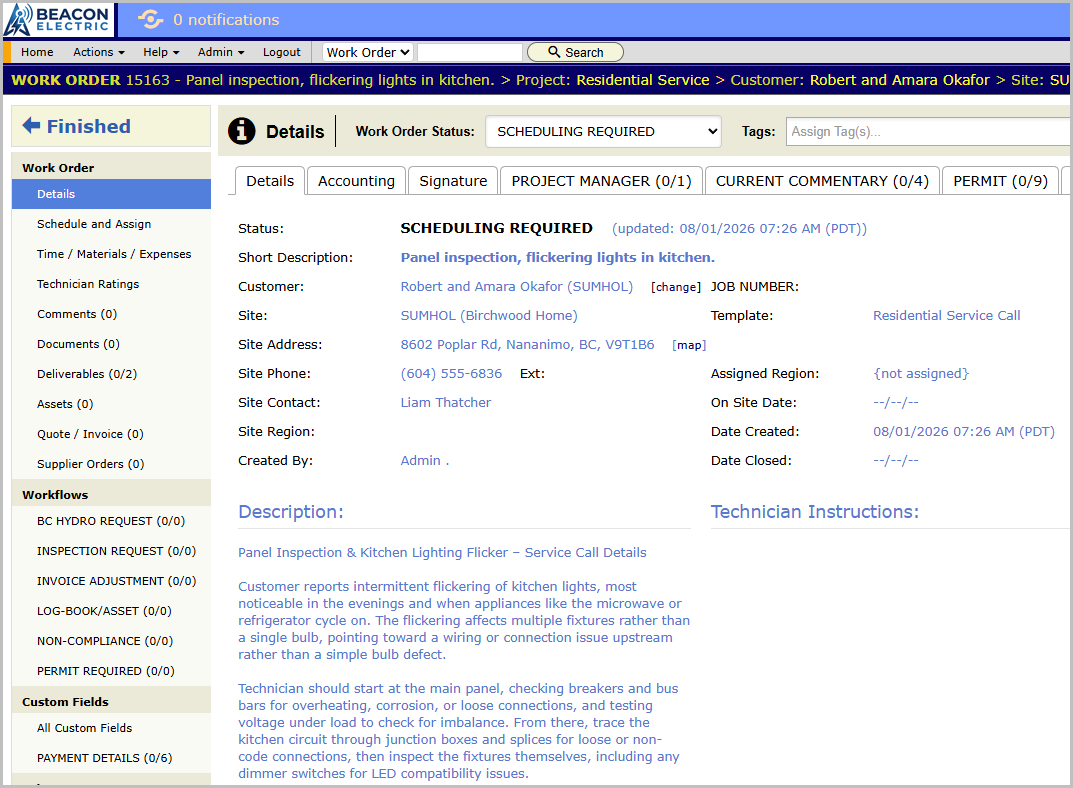
The work order you land on is the most important screen in BigWave. Chapter 15 walks it panel by panel.
Step 3: Assign a technician
- On the work order, open Schedule and Assign in the left panel.
- Add a schedule entry for the visit date.
- Assign Abigail, or any technician, to it.
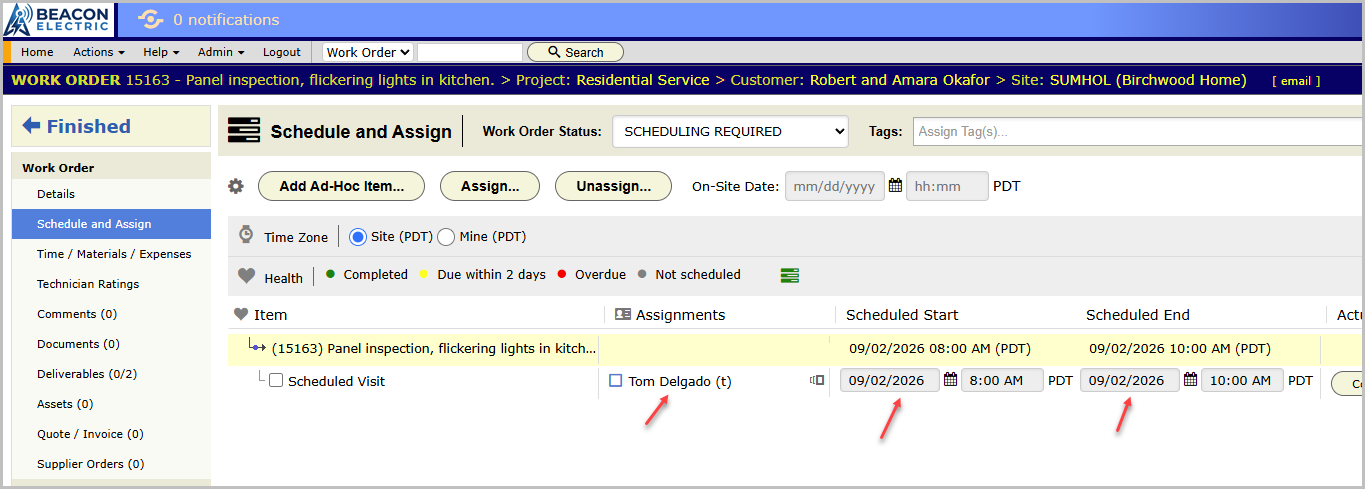
Abigail now sees this job under My Assignments when she logs in, and it appears on the resource calendar (chapter 16).
Step 4: Complete the job
After the visit, move the work order forward:
-
On the work order, open Time / Materials / Expenses, click Add Timecard…, and enter 2 hours against the job.
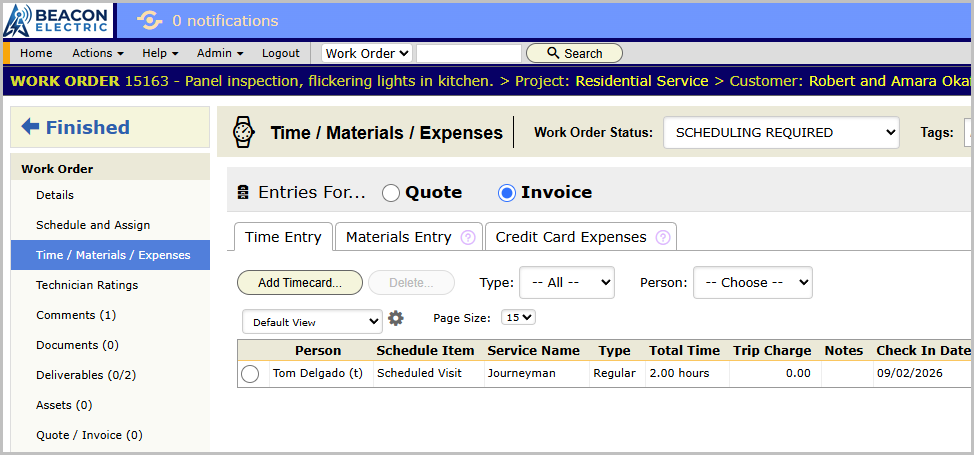
Showing 2 hours of time entered by the Abigail Delgado technician -
Open Comments and add a comment describing what was found: “Loose neutral at breaker 14, re-terminated. Recommended full panel replacement.”
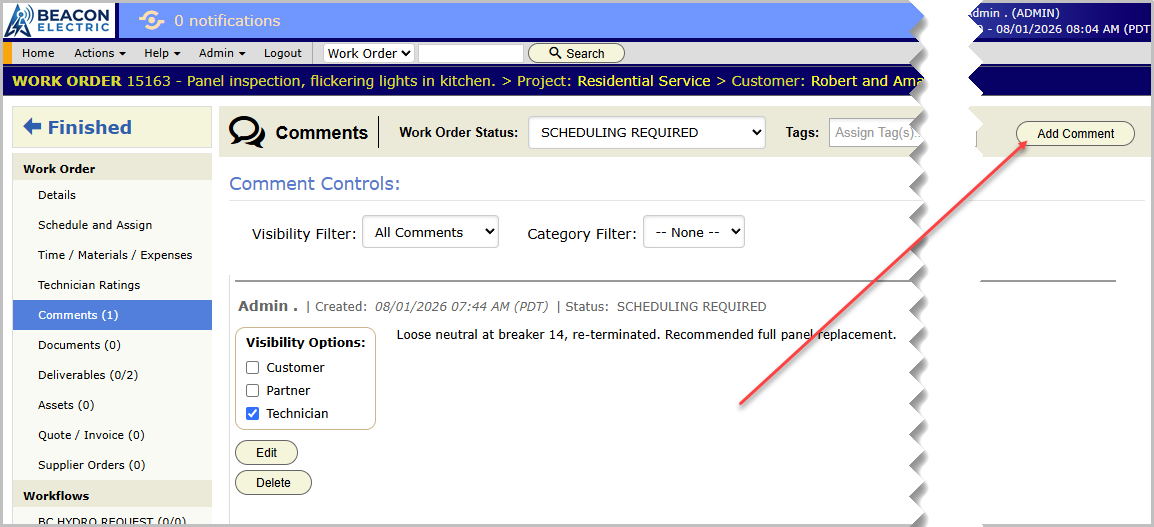
The Comments panel on the Okafor work order with the new comment saved -
On the Details panel, change the status to your work-complete status.
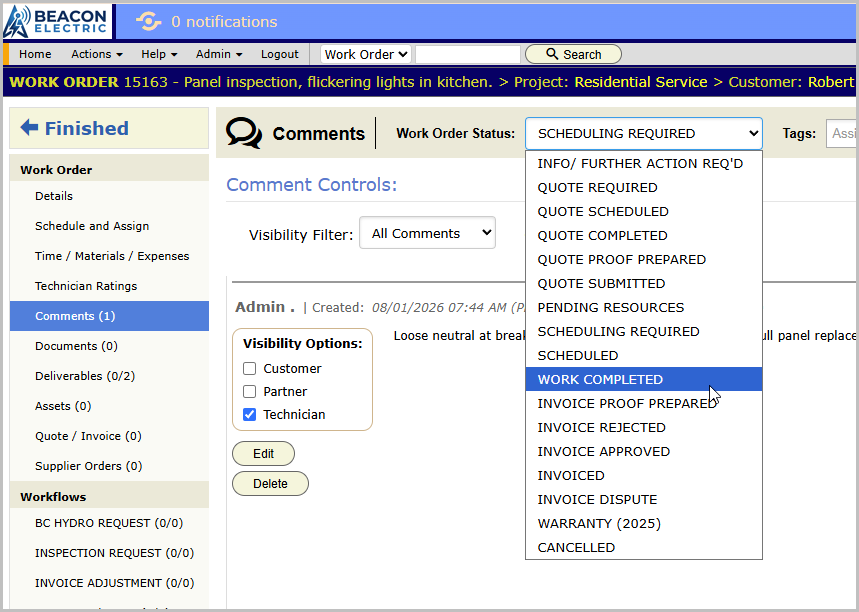
Statuses are how BigWave knows where every job stands, and they drive billing and automation. Designing a good status flow is chapter 7.
Step 5: Invoice it
-
On the work order, open Quote / Invoice.
-
Generate the invoice. Notice the timecard has created a labor invoice line item, complete with pricing automatically calculated.
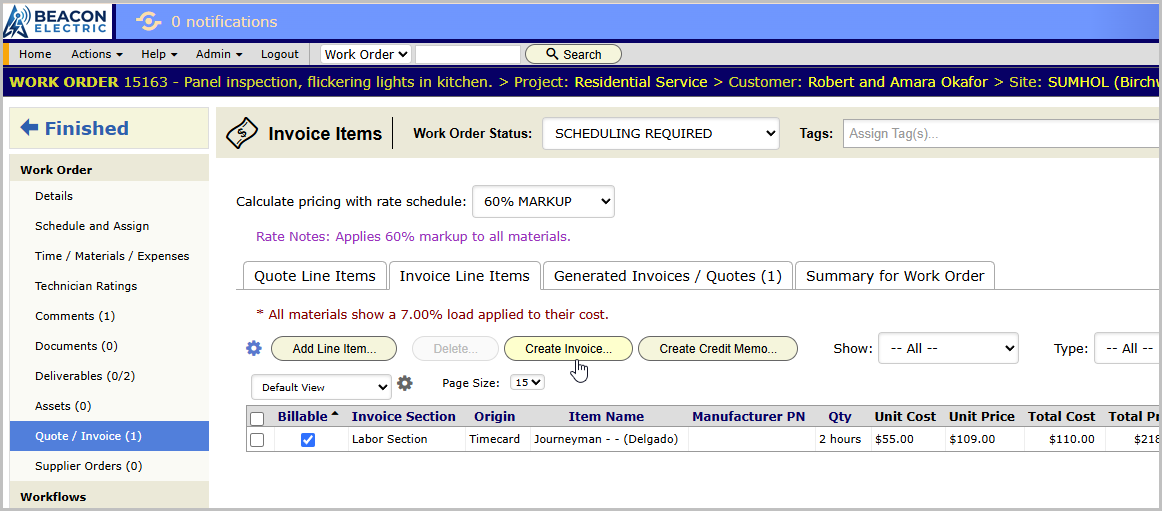
The Invoice panel with one line item entered from the previously created timecard -
Email it to the Okafors’ address on file.
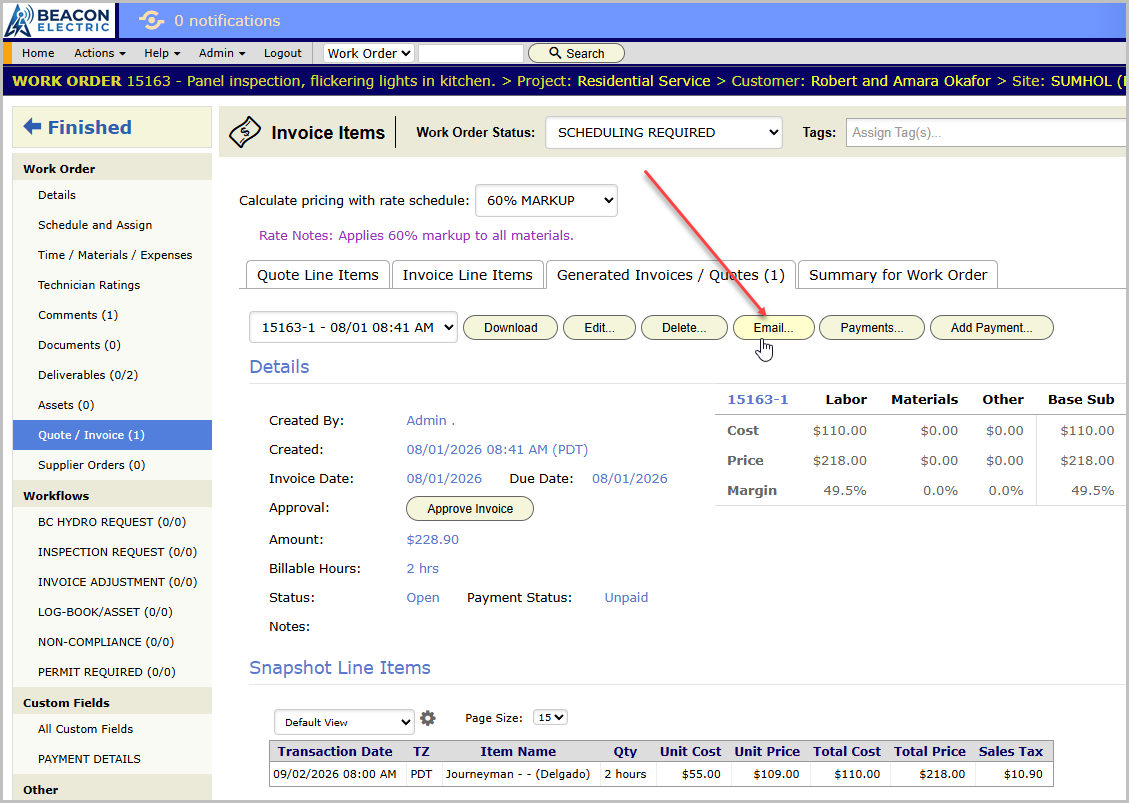
Invoices are emailed once created from the Generated Invoices tab
Chapter 19 covers invoicing details: contract rates, the materials database, supplier purchase orders, credit card receipts, and asset chargeouts.
What you just did
Customer, site, work order, assignment, time cards, comments, status, invoice. That’s the basic workflow. Everything else in BigWave, custom fields and templates and alerts and assets and portals and imports, exists to make that loop faster, more consistent, or more automatic at scale.
Now go read chapter 1. It explains what these pieces are and how they fit, it’s short, and every other chapter leans on it.